
A concrete countertop can look impressive immediately after casting, but its final character emerges during careful finishing. Edges, small surface marks, and uneven areas may need attention before a compatible sealer is applied. Contractors and hands-on fabricators comparing z grit disc los angeles products should consider how abrasive selection affects the process rather than choosing discs by price alone. The goal is to create a consistent surface without removing more material than the design requires.
Begin With the Countertop’s Condition
Freshly demolded concrete may show minor ridges, pinholes, or marks left by forms. Some imperfections need patching rather than sanding, and deeper defects may require a compatible repair product. Inspect the surface under angled light to distinguish raised spots from voids.
Check the material’s curing and finishing requirements before working. Concrete that is not ready for abrasion can respond differently from a mature surface. Decorative aggregate may require a different plan from a smooth cement-rich finish.
Match Disc Design to the Equipment
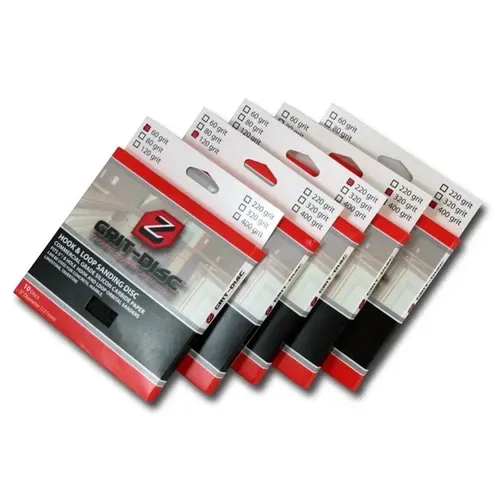
The Z Grit Disc 6 Pack listed by the supplier contains commercial-grade silicon carbide sanding discs intended for concrete, stone, and countertop surfaces. Its page specifies compatibility with standard five-inch, eight-hole hook-and-loop orbital sanders. That information matters when checking tool fit.
Do not assume that every grinder or sander accepts the same disc. Confirm backing type, hole pattern, recommended operating conditions, and the manufacturer’s instructions. A correct fit improves control and helps ensure that dust extraction and tool operation work as intended.
Plan a Sensible Abrasive Progression
Beginning with an unnecessarily aggressive grit can introduce scratches that demand additional work later. Choose the initial abrasive based on actual high spots or surface marks. Then progress through suitable finer stages when required for the intended finish.
Keep the sanding pattern consistent and inspect the surface between stages. Skipping an intermediate step may leave visible scratches beneath clear sealer. Equally, excessive sanding can expose more aggregate than the customer expects. Test a small section before committing to the entire countertop.
Prepare Tools and Safety Controls
Fine concrete dust should not be treated like ordinary household debris. Suitable extraction, respiratory protection, eye protection, and ventilation depend on the work and equipment used. Follow applicable safety requirements and the tool manufacturer’s instructions rather than improvising with an unsuitable vacuum.
Before starting, check:
- Disc diameter, backing, and hole pattern.
- Surface readiness and necessary repairs.
- Planned grit sequence and test area.
- Dust extraction and protective equipment.
- Edge details and nearby finished surfaces.
- Sealer compatibility with the final texture.
A documented setup helps team members produce a consistent finish and reduces rework.
Protect Edges and Decorative Details
Countertop corners and sink openings can be vulnerable to chipping during aggressive sanding. Use controlled pressure and appropriate tools for narrow areas. An orbital disc intended for broad surfaces may not be the right option for every inside corner or shaped edge.
Where pigments or exposed aggregate form part of the design, finishing choices can change the final appearance. Discuss the acceptable level of variation before removing material. Photographing the sample provides a reference for the project team.
Choose Supplies as a Connected Workflow
Fabricators searching for epoxy supplies los angeles may also need countertop forms, patching materials, pigments, sealers, and protective tools. The supplier’s catalog includes these categories, but selection should follow the specific countertop system rather than a generic flooring checklist.
Before sealing, confirm that sanding residue has been removed using approved methods and that the surface meets the sealer manufacturer’s preparation requirements. A clean appearance does not guarantee that residual dust or moisture is acceptable. Keep product instructions together throughout fabrication.
Check the Result Before Final Sealing
Inspect the countertop under the lighting in which it will be used, not only under workshop lamps. Look for remaining scratches, inconsistent sheen, chipped edges, and repairs requiring further attention. A sealer may highlight flaws rather than conceal them.
Once the finish is approved, document the material and maintenance instructions for the owner. Countertops encounter food spills, cleaning products, heat, and abrasion; appropriate care depends on the selected sealer. Clear expectations help protect the work after installation.
Conclusion
Concrete countertop finishing rewards careful abrasive selection, equipment compatibility, and disciplined inspection between steps. Choosing the correct disc is important, but so are surface repairs, dust control, and the final protective treatment. Fabricators should follow product-specific instructions rather than rely on a universal grit sequence. Professionals working in Los Angeles and surrounding communities can explore countertop abrasives, finishing accessories, and related materials through whatittakesla.com while planning projects that balance appearance with everyday use.